Create colorful background for Valentine’s Day
January 18th, 2010 by ART-D Posted in Adobe Photoshop, Designing
Now we have to make a copy of the very first layer containing the heart and choose then the Free Transform (Ctrl+T) command (click on Maintain Aspect Ratio button in Options bar) to make the copy smaller.

For this shape click on Add a layer style icon from bottom part of the Layers panel and select Inner Shadow:

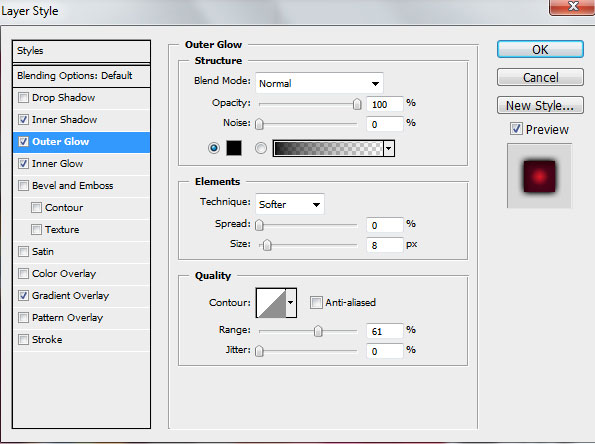
Set the Outer Glow settings:
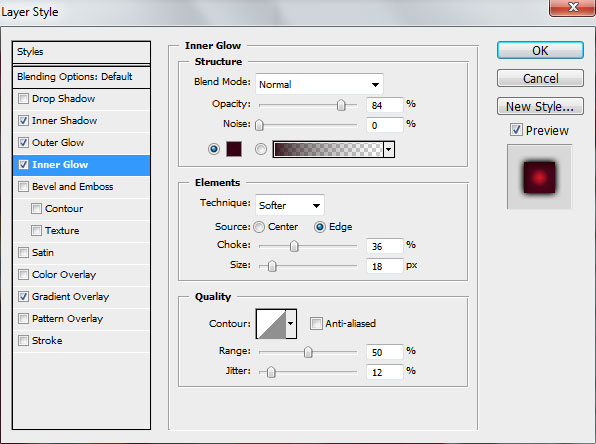
Add Inner Glow:
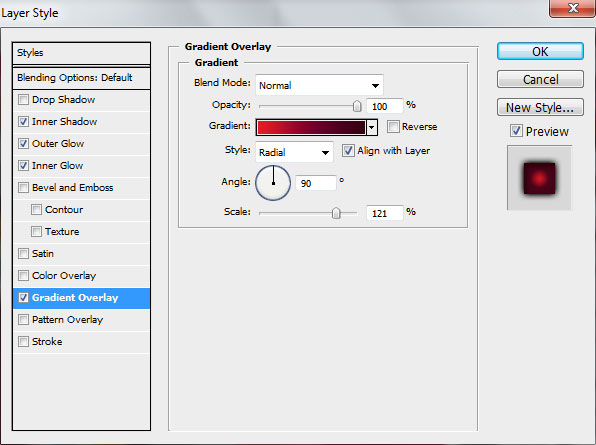
Set the Gradient Overlay:
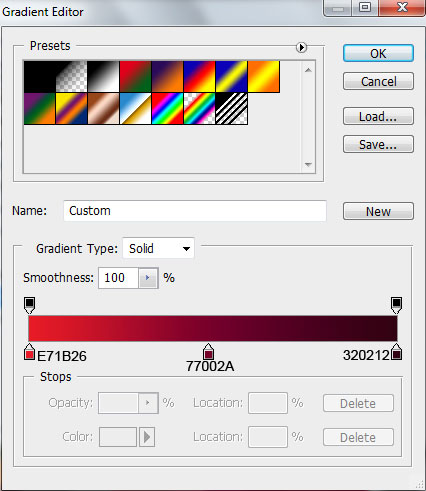
Click in the color bar to open the Gradient Editor and set the color stops as shown. Click OK to close the Gradient Editor dialog box.
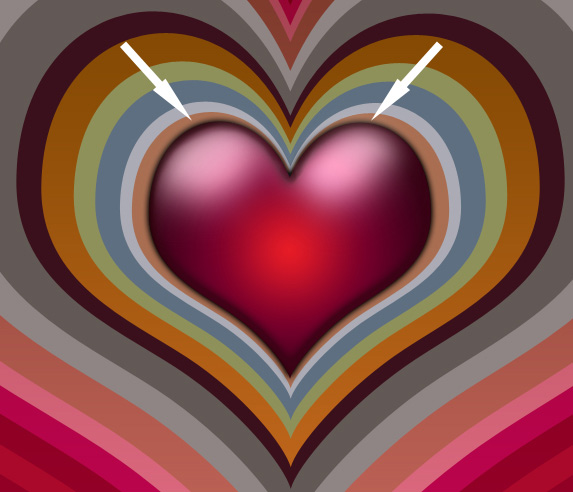
We’ve got the next effect on the heart:

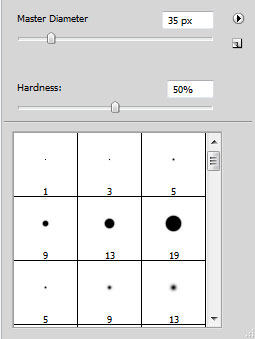
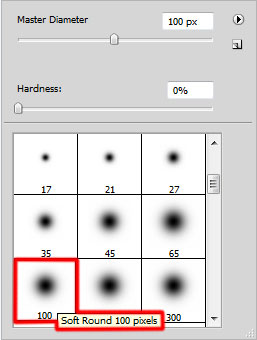
Create a new layer and select for it a Soft Round brush from Brush Tool (B) of white color (also set the Opacity to 25%)

Using Soft Round brush, represent several highlights on the heart.

Click on the same layer on the bottom part of the Layers panel on Add layer mask icon, click on mask to make it active and use a Hard Mechanical brush
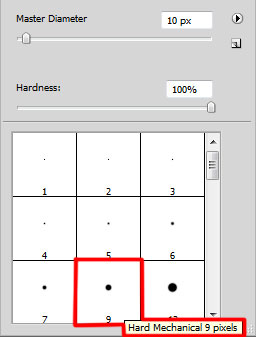
Paint on the mask to clean out the highlights’ edges.
Using the Pen Tool (P) we’ll represent a highlight of white color.

Set the Fill to 50% for this layer

Create a new layer and select the Hard Round brush and white color
Represent a kind of spot

Use Free Transform (Ctrl+T) command
on the highlight’s layer to stretch it out laterally. Make a copy of
the layer containing the highlight, placing both their layers the same
way indicated on the next picture.

Set the Fill to 66% for these layers

Let’s represent now on the bottom part of the heart a voluminous element, applying the Pen Tool (P).

Set the Blending mode to Linear Dodge for this layer, also reduce the Fill to 11%

On the next new layer we’ll select the Soft Round brush of the color #ED1F78 to represent several small spots (Opacity 20%).

Set Fill to 67% for layer with spots

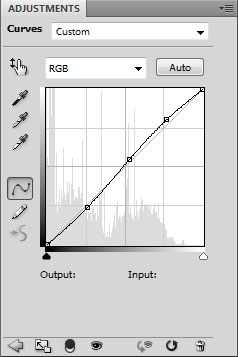
Select Create new fill or adjustment layer from bottom part of the Layers panel and click to Curves to adjust the curve shape as shown to add contrast on image:
We’ve got the next effect

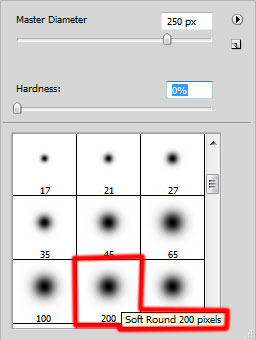
Create a new layer and choose here the Soft Round brush of black color (Opacity 5%)
make darker the background’s edges using Soft Round brush.

On the next new layer we’ll apply the Crosshatch brush from Assorted brushes set
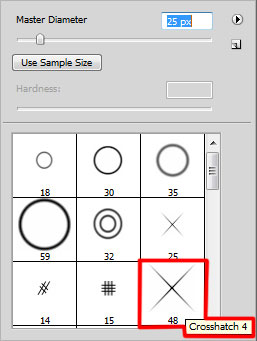
Represent many stars of different diameter using Crosshatch brush.

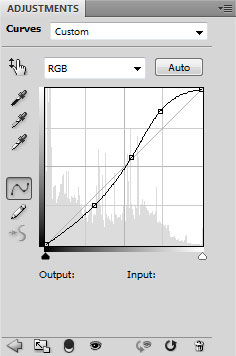
Select again Create new fill or adjustment layer from bottom part of the Layers panel and click to Curves to adjust the curve shape as shown to add more contrast on image:
We’ve got the next result:

Finished!
View full size here.

