Create colorful background for Valentine’s Day
January 18th, 2010 by ART-D Posted in Adobe Photoshop, Designing
Make another copy
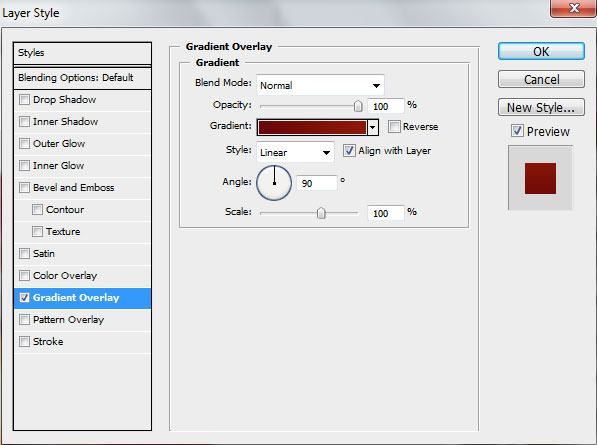
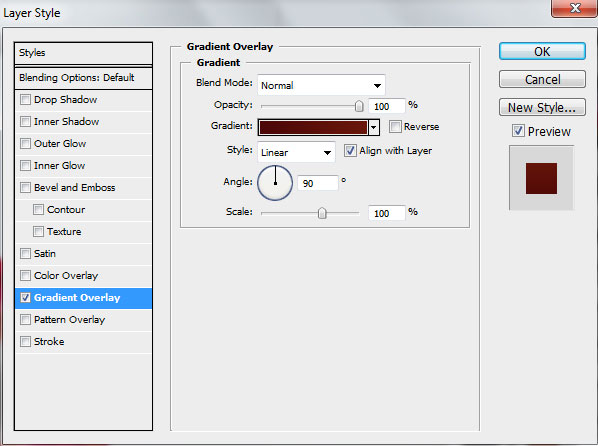
Again the Layer Style > Gradient Overlay
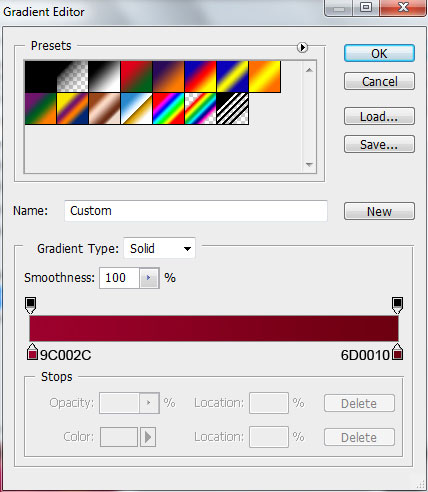
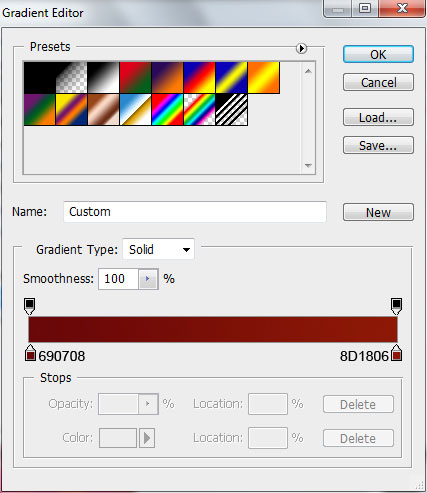
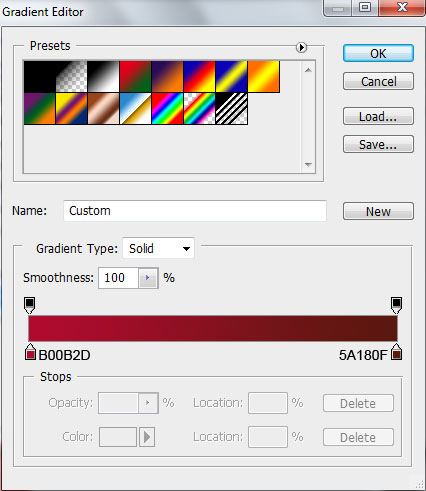
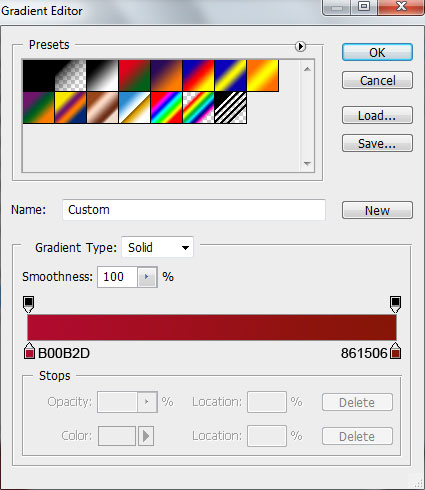
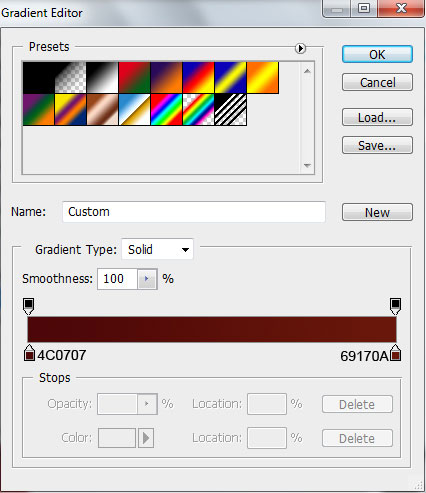
Open the Gradient Editor and set the color stops as shown.
We’ve got the next gradient on the shape

Make another copy
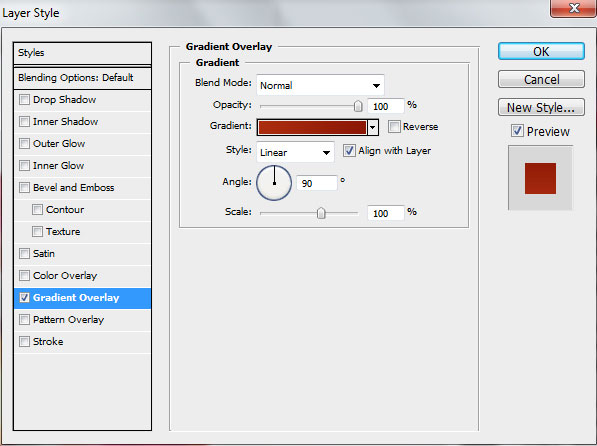
Select the Layer Style > Gradient Overlay for this shape

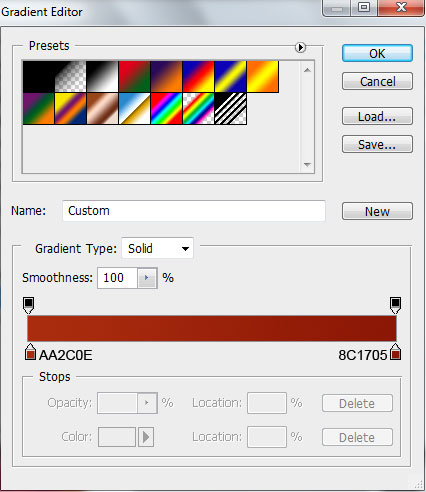
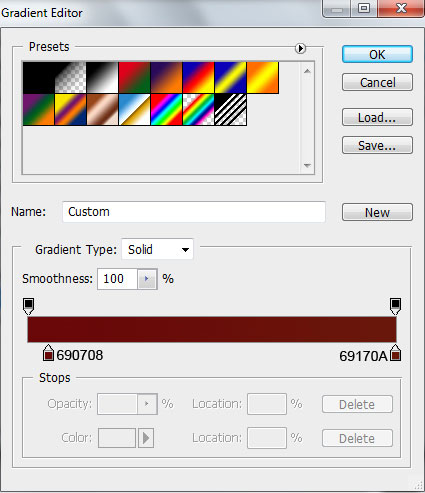
Open the Gradient Editor and set the color stops as shown. Click OK to close the Gradient Editor dialog box.
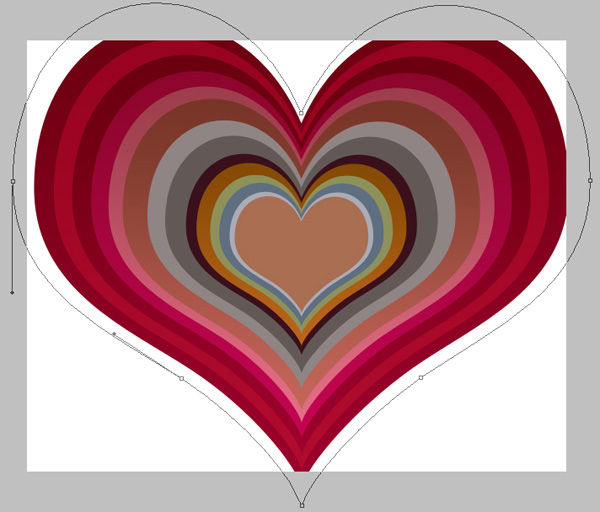
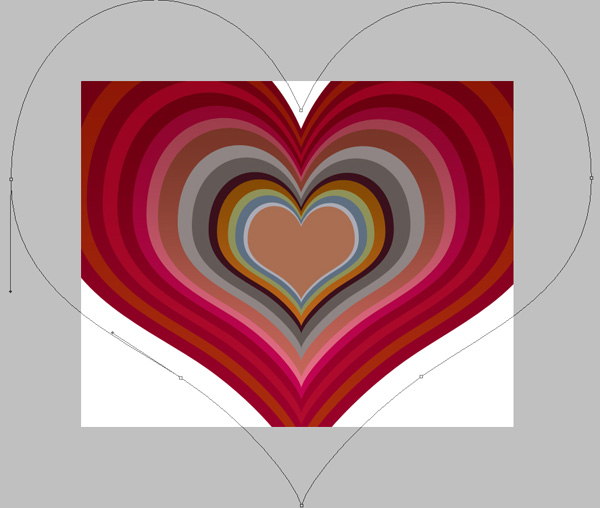
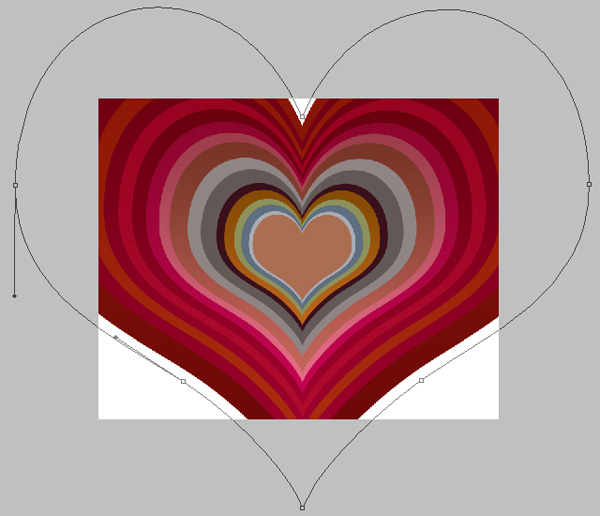
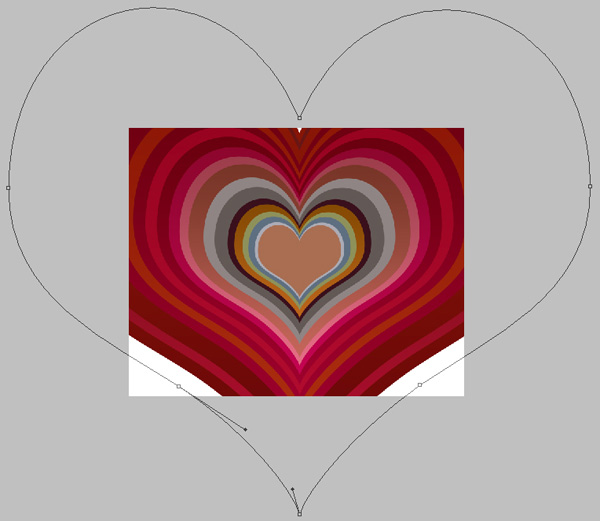
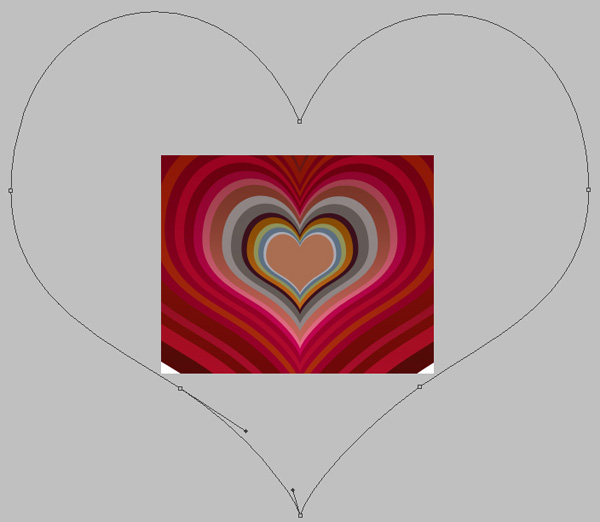
We’ve got the next result:

Another one
Go to Layer Style > Gradient Overlay
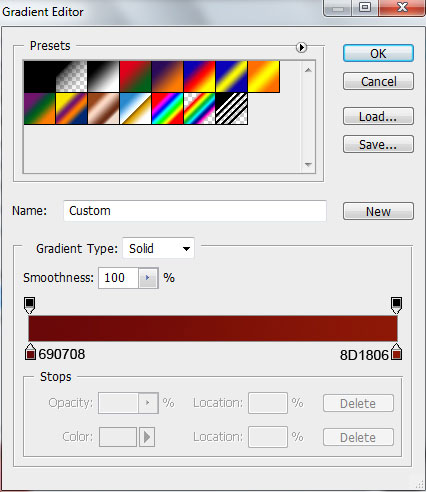
Open the Gradient Editor and set the color stops as shown.
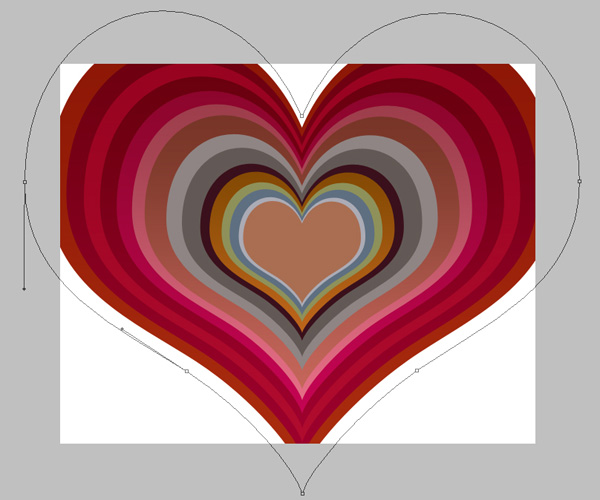
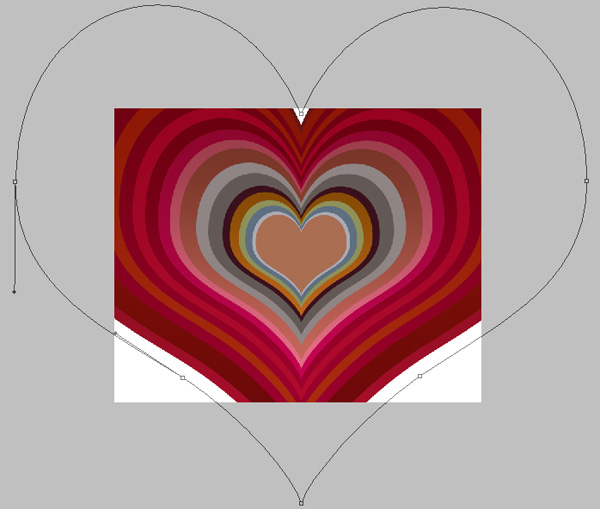
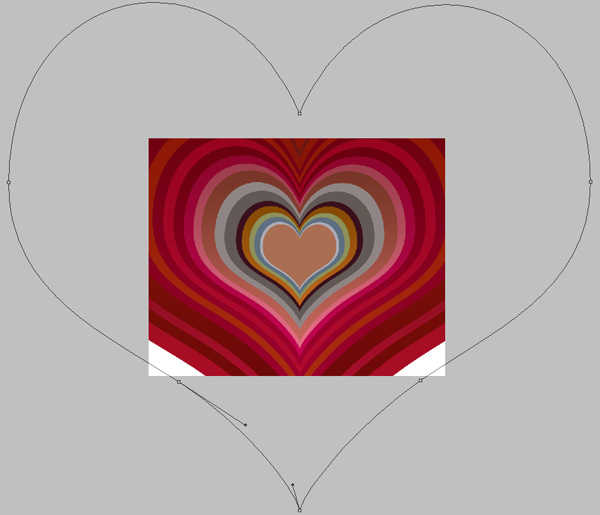
We’ve got the next result:

Make another copy and use Free Transform (Ctrl+T) to enlarge the shape as shown:
Click on Add a layer style icon from bottom part of the Layers panel and select Gradient Overlay:

Click in the color bar to open the Gradient Editor and set the color stops as shown. Click OK to close the Gradient Editor dialog box.
We’ve got the next result:

Make another copy:
Go to Layer Style > Gradient Overlay

Open the Gradient Editor and set the color stops as shown.
We’ve got the next result:

One more copy
Click on Add a layer style icon from bottom part of the Layers panel and select Gradient Overlay:

Click in the color bar to open the Gradient Editor and set the color stops as shown. Click OK to close the Gradient Editor dialog box.
We’ve got the next result:

Make another copy of heart shape
Go to Layer Style > Gradient Overlay
Open the Gradient Editor and set the color stops as shown. Click OK to close the Gradient Editor dialog box.
We’ve got the next result:

Make the last copy of the heart shape and enlarge it with Free Transform (Ctrl+T) as shown:
Click on Add a layer style icon from bottom part of the Layers panel and select Gradient Overlay:

Click in the color bar to open the Gradient Editor and set the color stops as shown. Click OK to close the Gradient Editor dialog box.
We have finished to represent the background: