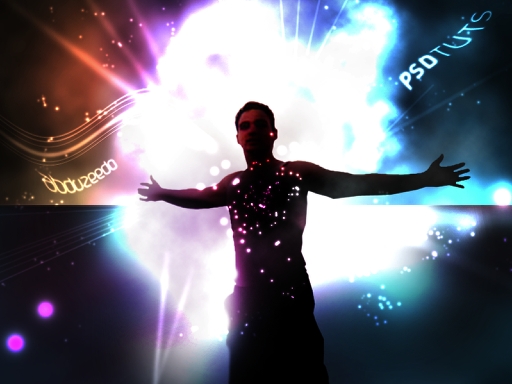
Make an Apple Coldplay Style Ad in Photoshop
Recently, Apple released a new iTunes video advertisement
featuring the band Coldplay and the song, "Viva la Vida." As is
usual with Apple ads, this commercial is very beautiful. The
coolest thing is that this time they chose to use light effects
with glows and sparks. As I'm a really big fan of this style, I
thought it would be nice to have a tutorial showing how to create
that effect.
I am a Brazilian designer living in Porto Alegre (south of
Brazil). In 2003, I founded a web design studio called ZEE, with Fabiano Meneghetti, an
architect and friend of mine. It's a small studio now, with 4
people working basically with web.
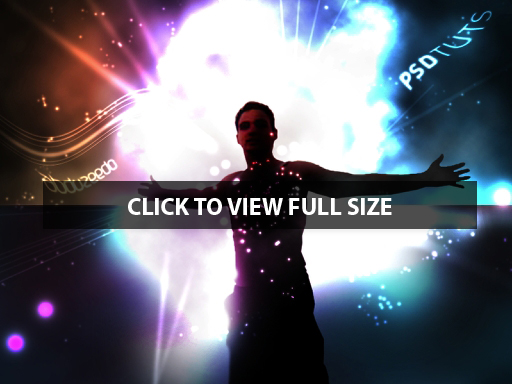
Final Image Preview
Before we get started, let's take a look at the image we'll be
creating. Click the screenshot below to view the full-size image.
As always, the layered Photoshop file is available via our PSDTUTS Plus
membership.
In this tutorial, I will show you how to create a very similar
effect to that used in the Apple Coldplay Video
Ad. If you have done the Sparkling Hot
Girl tutorial in Photoshop, you will find it similar in some
steps of this tutorial. You can download the image needed for this
tutorial here.
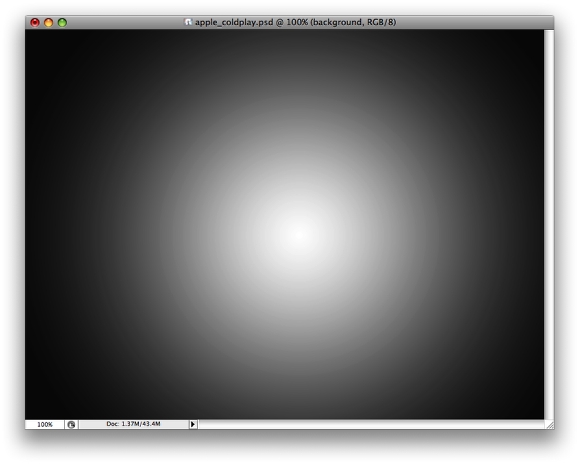
Step 1
Create a new document and fill it with a Radial Gradient. Use a
dark gray(#161616) and White. The white will be the main light.
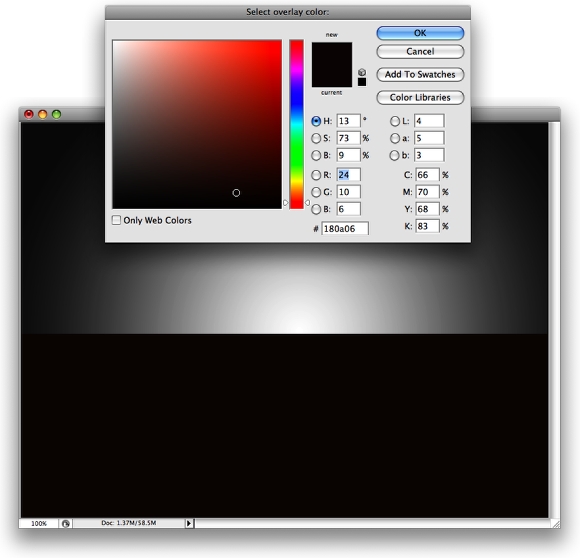
Step 2
With the Rectangle Tool (U), create a rectangle with half of the
height of the screen. It will serve as the floor. Use a very dark
red (#180a06).
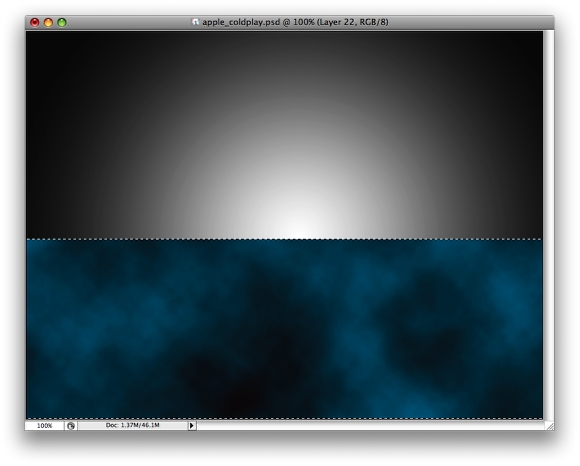
Step 3
Add a new layer and create a marquee selection from the floor
layer. You can do that by right-clicking over the layer's
thumbnail. Then choose Select Pixels. After that, select a blue
(#113e4b) for the foreground color and black for the background.
Then go to Filter>Render>Clouds.
Step 4
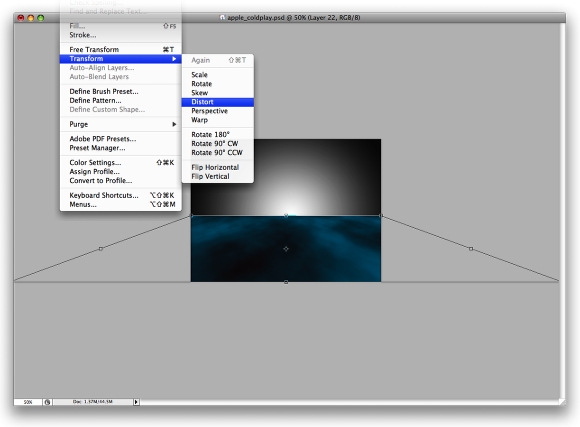
Go to Edit>Transform>Distort. Use this command to apply
perspective to the clouds. Just move the vertices, as in the image
below.
Step 5
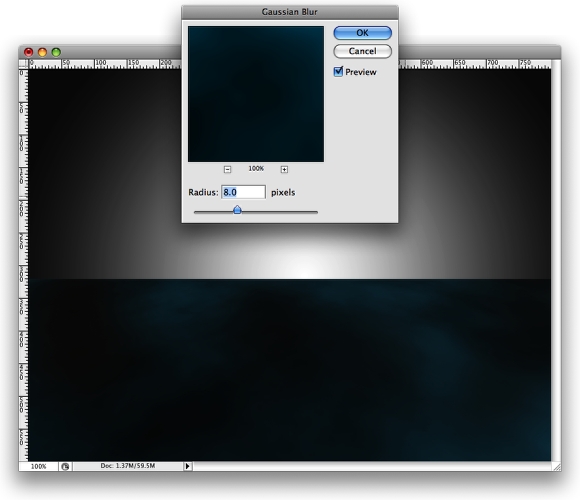
Next add a bit of blur by going to Filter>Blur>Gaussian
Blur. Use 8 pixels for the Radius. You can even change the Opacity
to 70%. If you want to make it darker, use the Eraser Tool (E) and
set the tools brush size to a 0 Hardness. Then erase some parts of
the layer.
Step 6
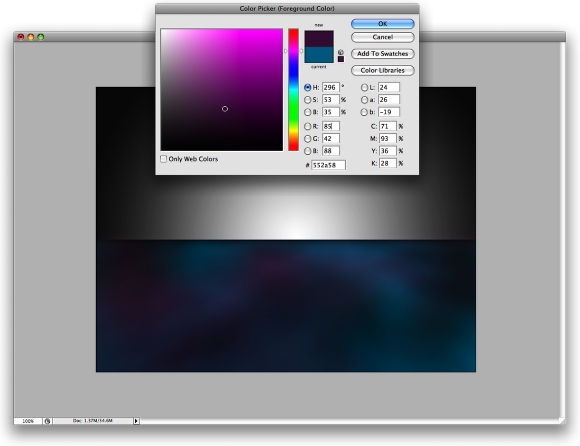
Now it's necessary to repeat the steps we used to create the
floor with the Render Clouds. However, instead of using blue for
the color, use a dark pink (#552a58). Tip: If you duplicate the
blue layer, it won't work because we need to use different
clouds.
Step 7
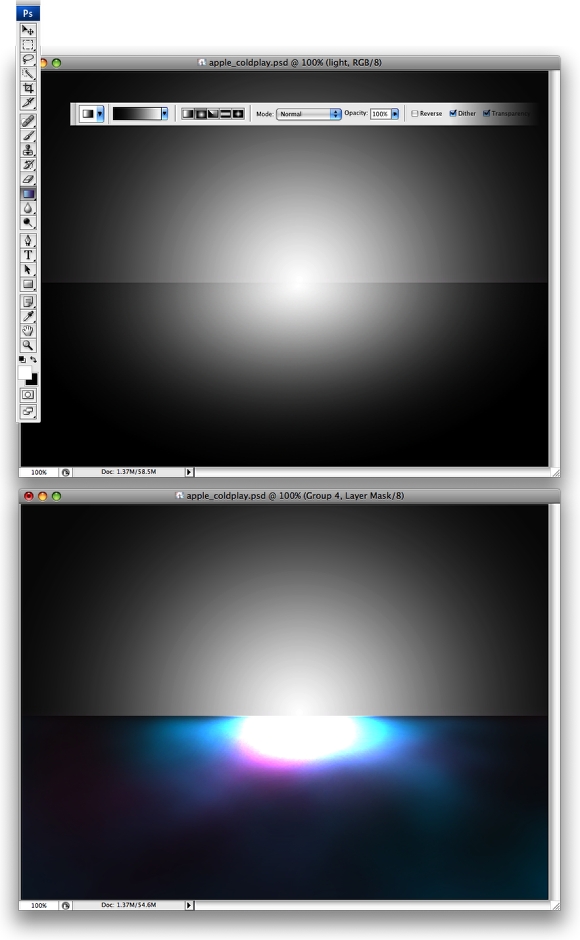
Create a new layer exactly like the previous one, and make it
the same height. Then select black and white for the colors. With
the Gradient Tool (G), fill the layer with a Radial Gradient. The
white has to be in the center. Then change the blend mode to Color
Dodge.
Step 8
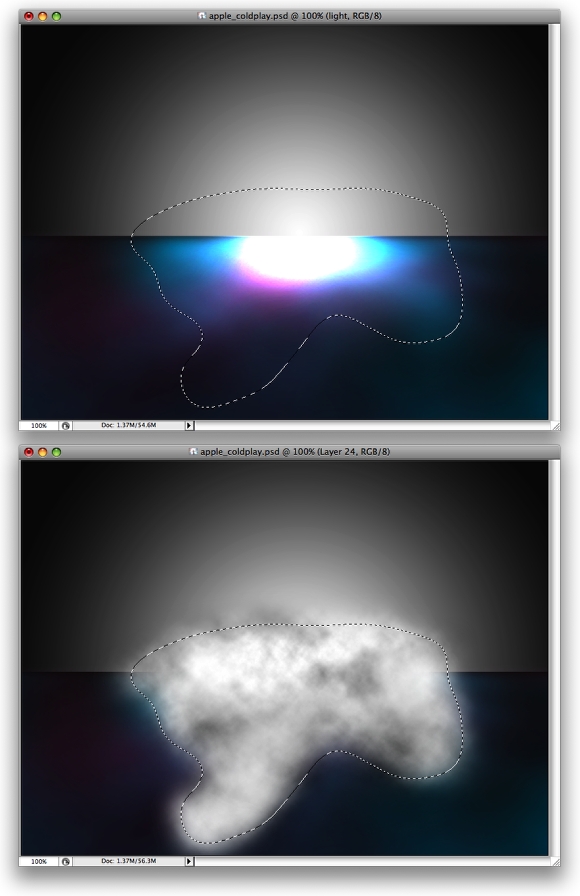
Now we create a new layer. Then select the Lasso Tool (L). Next
let's change the Feather to 20px. Then create a selection, as shown
below. Keep in mind that this element will be the light as well.
After that, select black and white for the background and
foreground colors. Then go to Filter>Render>Clouds.
Step 9
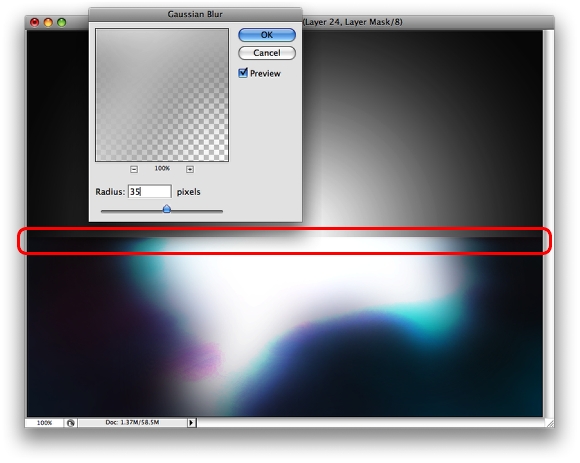
Now let's add more blur. To do that, go to
Filter>Blur>Gaussian Blur, and use 35 pixels for the Radius.
After that, the most important thing, change the blend mode to
Color Dodge. Then delete the part of the cloud that is not exactly
on the floor, as I marked in the image below.
Step 10
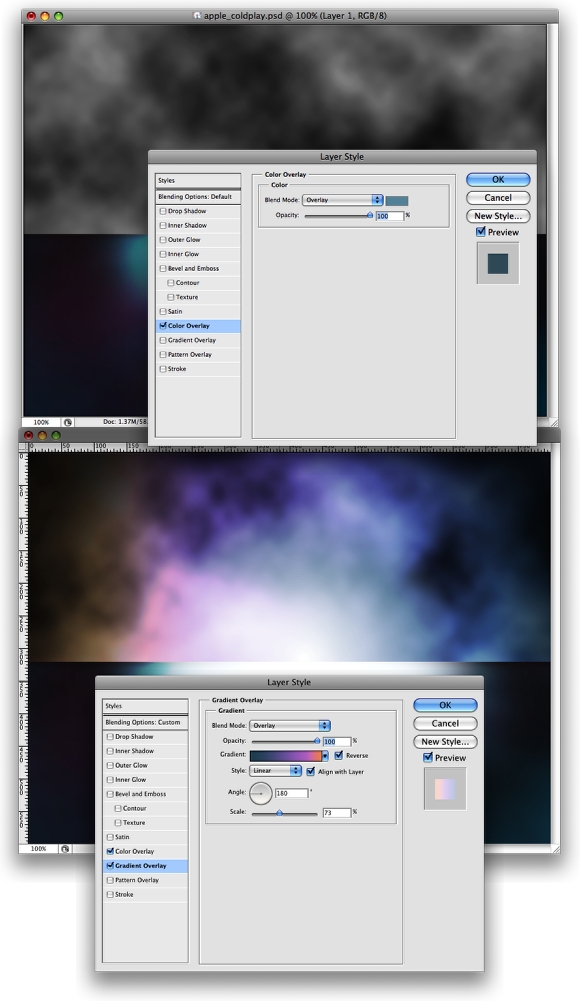
Next we will create the background's light. First create a new
layer. Then use black and a 50% gray for the colors. Then go to
Filter>Render>Clouds.
Let's add a Layer Style next by going to Layer>Layer Style.
First add a Color Overlay with (#84a7b8) for the color. Then change
the blend mode to Overlay. After that, select the Gradient Overlay.
Change the blend mode again to Overlay and use a gradient with
these colors: orange (#fba46f), pink (#cb8cd4), green (#346777).
Use Linear for the Style and 180º for the Angle.
Step 11
Create a new layer on top of the others. Then with the Lasso
Tool (L) and a 20px Feather, create a selection, as shown below.
Then using the same black and a 50% gray for the colors, go to
Filter>Render>Clouds. Then using the Blur Tool, add a blur to
some areas. After that, change the blend mode to Color Dodge.
Step 12
Place a photo on the document. Then cut out the background and
leave just the person. Use the tools you feel comfortable with to
accomplish this. I used the Pen Tool (P).
Step 13
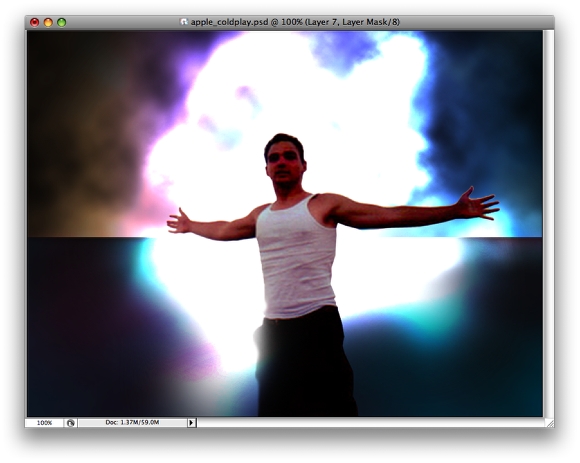
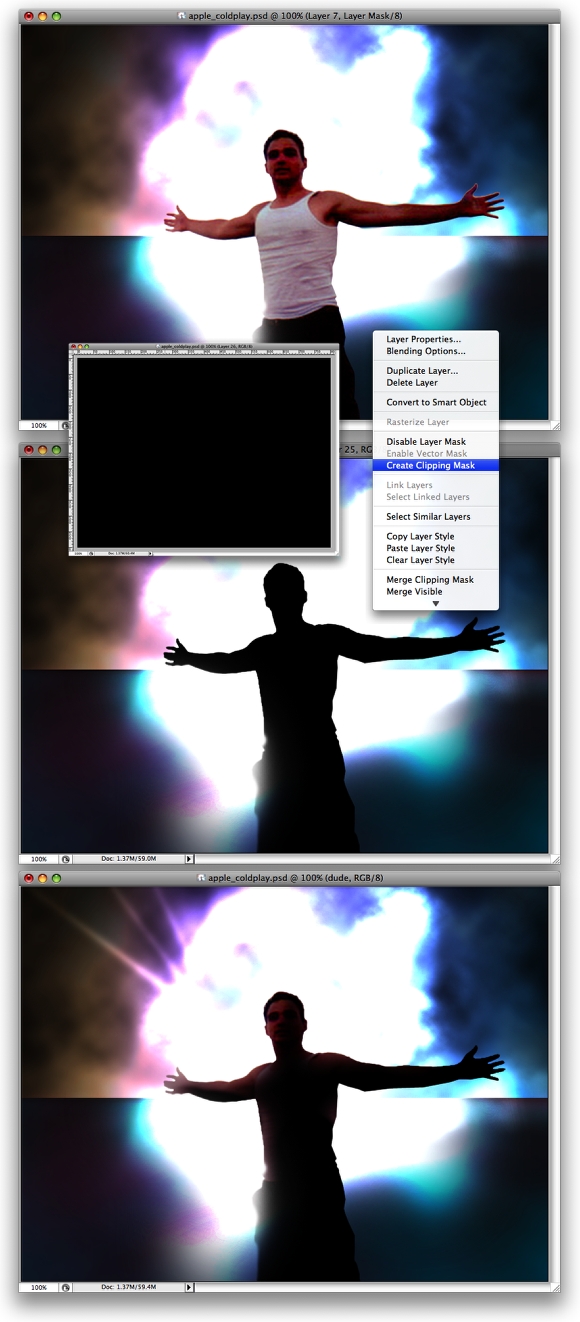
Create a new layer on top of the layer named "dude." Fill it
with black. Then go to Layer>Create Clipping Mask. Next select
the Eraser Tool (E), and pick a 100px Master Diameter Brush with 0%
Hardness. Then erase some parts of the layer, to add some
highlights to the guy.
Step 14
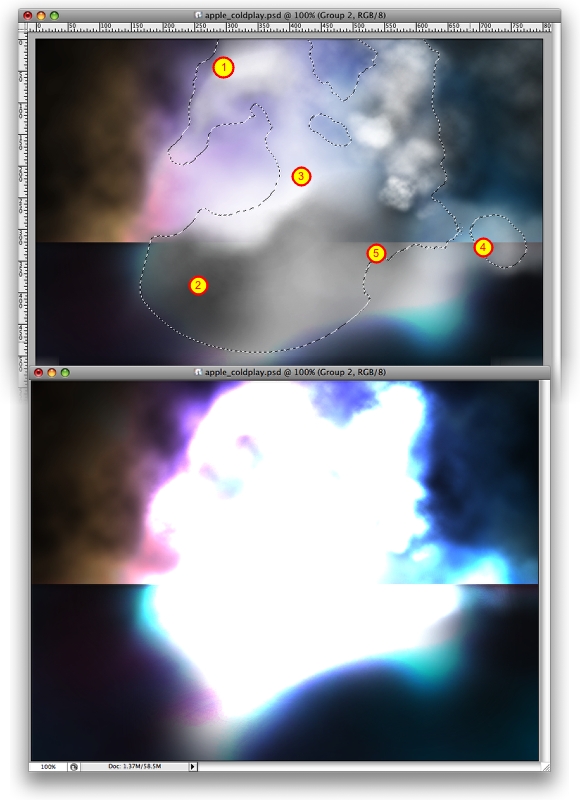
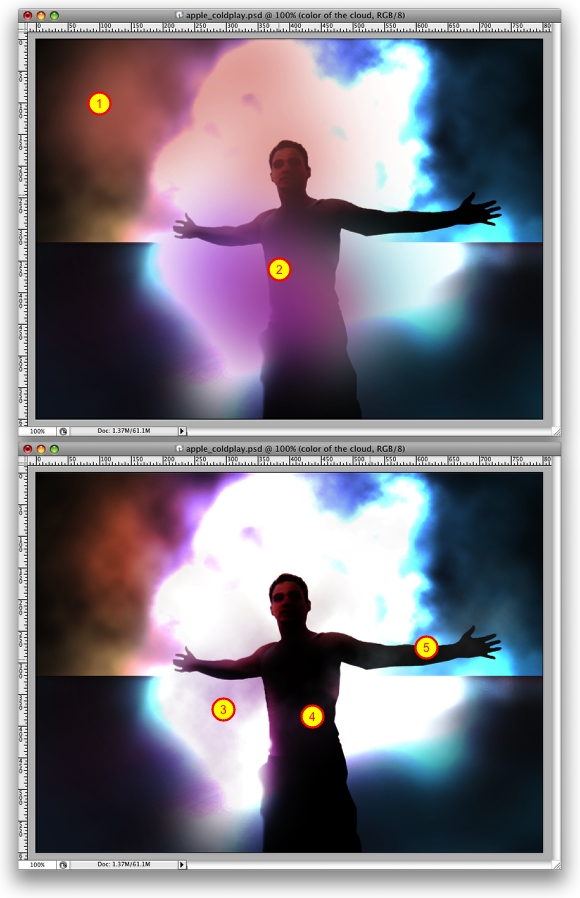
Now let's add some lights in front of the guy. To do that create
a new layer. Then choose a regular brush (the circle one), use a
big size like 200px, and use a 50% Opacity. Then choose first
Orange and Brush where I marked (1) in the image.
After that, choose a pink color. Then paint where the number (2)
is marked. Then change the blend mode of this layer to Overlay. You
can even add another layer with Clouds. Then with the Erase Tool
delete almost everything. Be sure to leave some smoke details in
front of him ( 3, 4, and 5).
Step 15
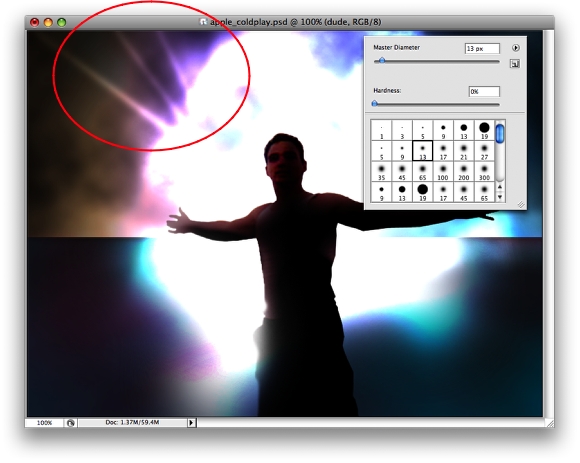
Create a new Folder and rename it to "sparks and rays." Then
change its blend mode to Color Dodge. Now the layers we create will
be placed inside this folder.
Next we create a new layer and choose the Brush Tool (B). For
the color use white and select a regular brush with a Master
Diameter of 13px and a Hardness of 0%. Then create three lines, as
shown in the image below. Tip: Press once, then hold the Shift
key and press where you want the end-point of the line. That will
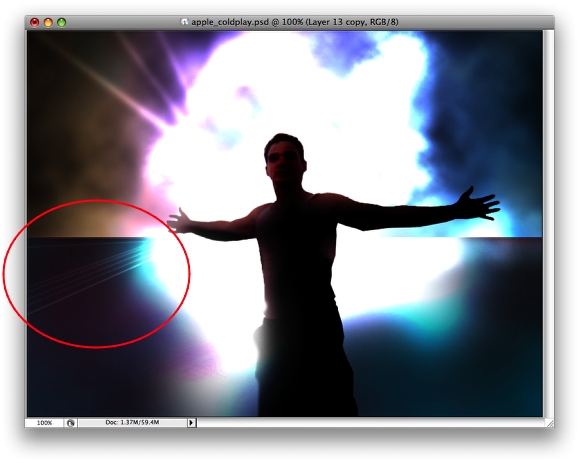
create a straight line.
Step 16
You can create another layer or use the same layer, but I
recommend you create a layer for each group of effects based on
brush diameters sizes. So now use a smaller diameter, like 4px.
Then create a few more rays of light, as in the image below.
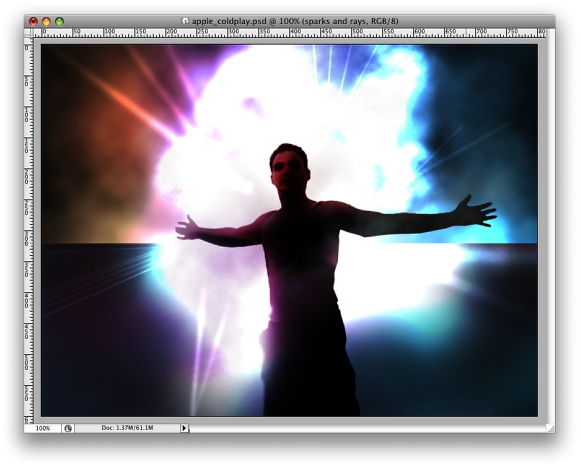
Step 17
Create more rays of light using different brush diameters and
opacities. Again, I recommend you create a new layer based on each
new brush size used. This will keep the file organized.
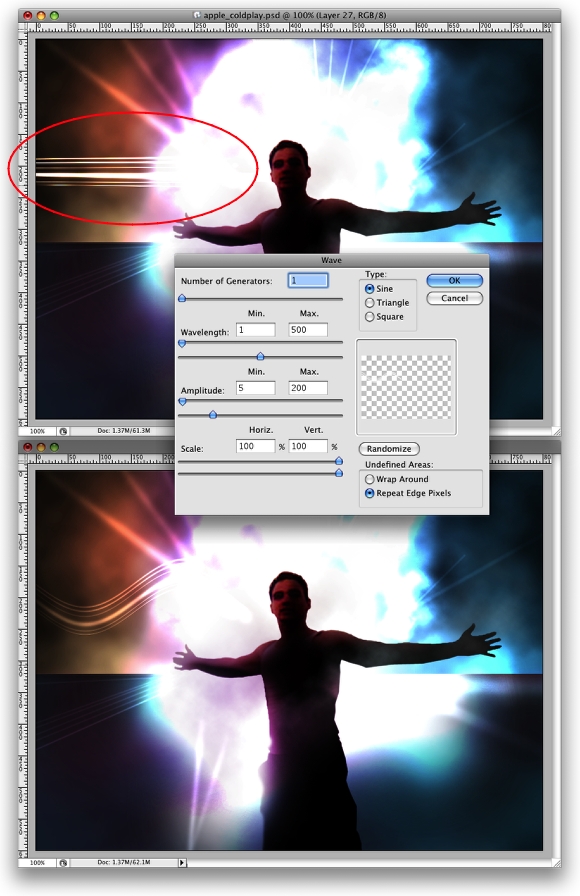
Step 18
It's fairly simple to create some curved rays. First, add a new
layer. Then create some lines. Be sure to use different Brush
Sizes, as I did. Then go to Filter>Distort>Wave. Use 1 for
the Number of Generators. Then set the Wavelength to Min 1 and Max
500. Then set the Amplitude to Min 5 and Max 200. Lastly, change
the layer's Opacity to 50%.
Step 19
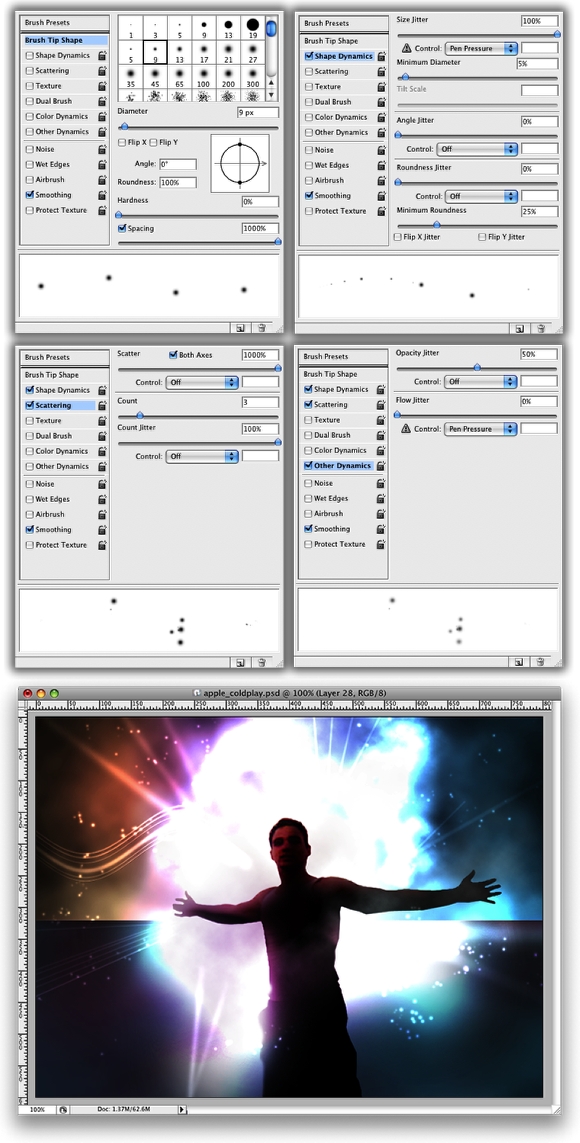
Next let's make the Sparks in the image. First, create a new
layer. Then select the Brush Tool (B). Then go to Window>Brushes
to open the Brush Engine. For the Brush Tip Shape use 100% for the
Spacing. For the diameter, start with 9px, though note that you can
change that to create bigger sparks. Over the Shape Dynamics use a
Size Jitter of 100%, Min Diameter of 5%, and Minimum Roundness of
25%. Over the Scattering, use 1000% for the Scatter and mark Both
Axes. Then select Other Dynamics and change the Opacity Jitter to
50%.
Now select white for the color and paint some sparks in the
image, as shown below. Tip: Use the left and right brackets on
your keyboard ([ ])to decrease and increase the Brush Diameter
quickly.
Conclusion
Add more sparks to the image. You can place some really big
sparks and some smaller sparks in front of the main figure. Many
sparks are placed across the figure's chest in the final image
below. Although it might look like a complicated effect to create,
it's actually quite simple. We use the same technique with the
Clouds almost every time. Actually, that's the technique to create
all sort of lighting effects.

